
Chip-Tools
Selecting the AVDI in Toyota Techstream, Honda HDS and Volvo VIDA
Strumenti
Interface Classic
Diagnostics
Basic
⏱ 10 min
6 steps
Techstream, Honda HDS and Volvo VIDA recognise the AVDI straight after the passthru driver is installed: you just have to select it in the interface selection menu. This guide covers all three selection paths.
Required licences
- —
Hardware / cables
 AVDI
AVDI- cavo USB
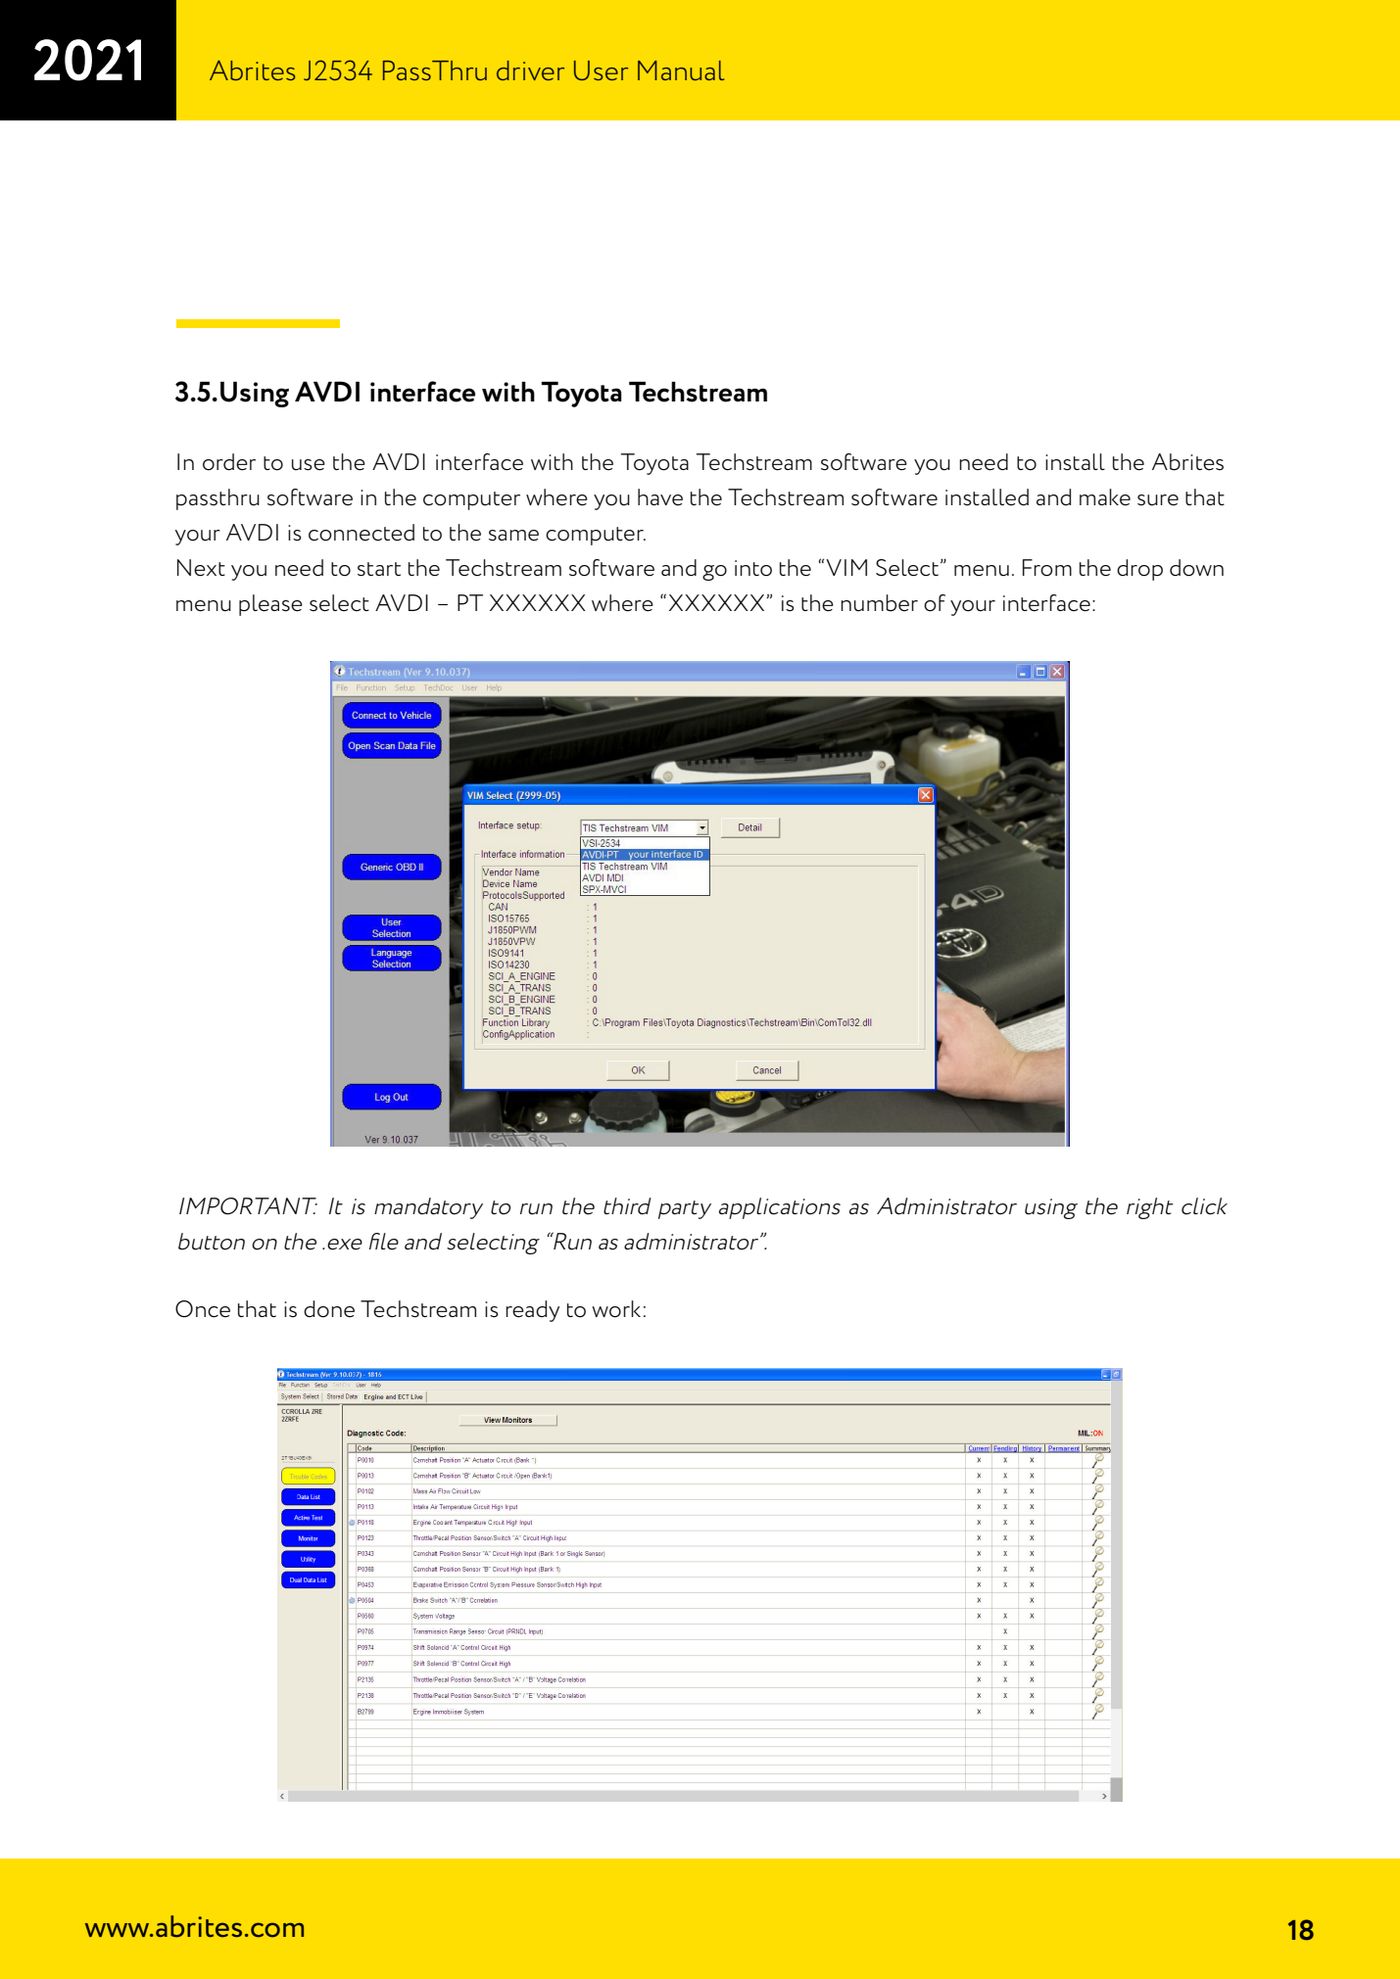
⚠ WarningAll three applications must be started as administrator (right-click the .exe file -> "Run as administrator"), otherwise they will not see the passthru interface.
Procedure
- Install the Abrites passthru driver on the computer running the OEM software and connect the AVDI to the same computer.
- Toyota/Lexus/Scion Techstream: start Techstream as administrator, go into the "VIM Select" menu and choose "AVDI - PT XXXXXX" from the drop-down menu, where XXXXXX is your interface number. The software is ready to work.
- Honda/Acura HDS: start the Honda Diagnostic System, press F12 and in the "Comms Interface" field select "SPX-MVCI". The application is ready.
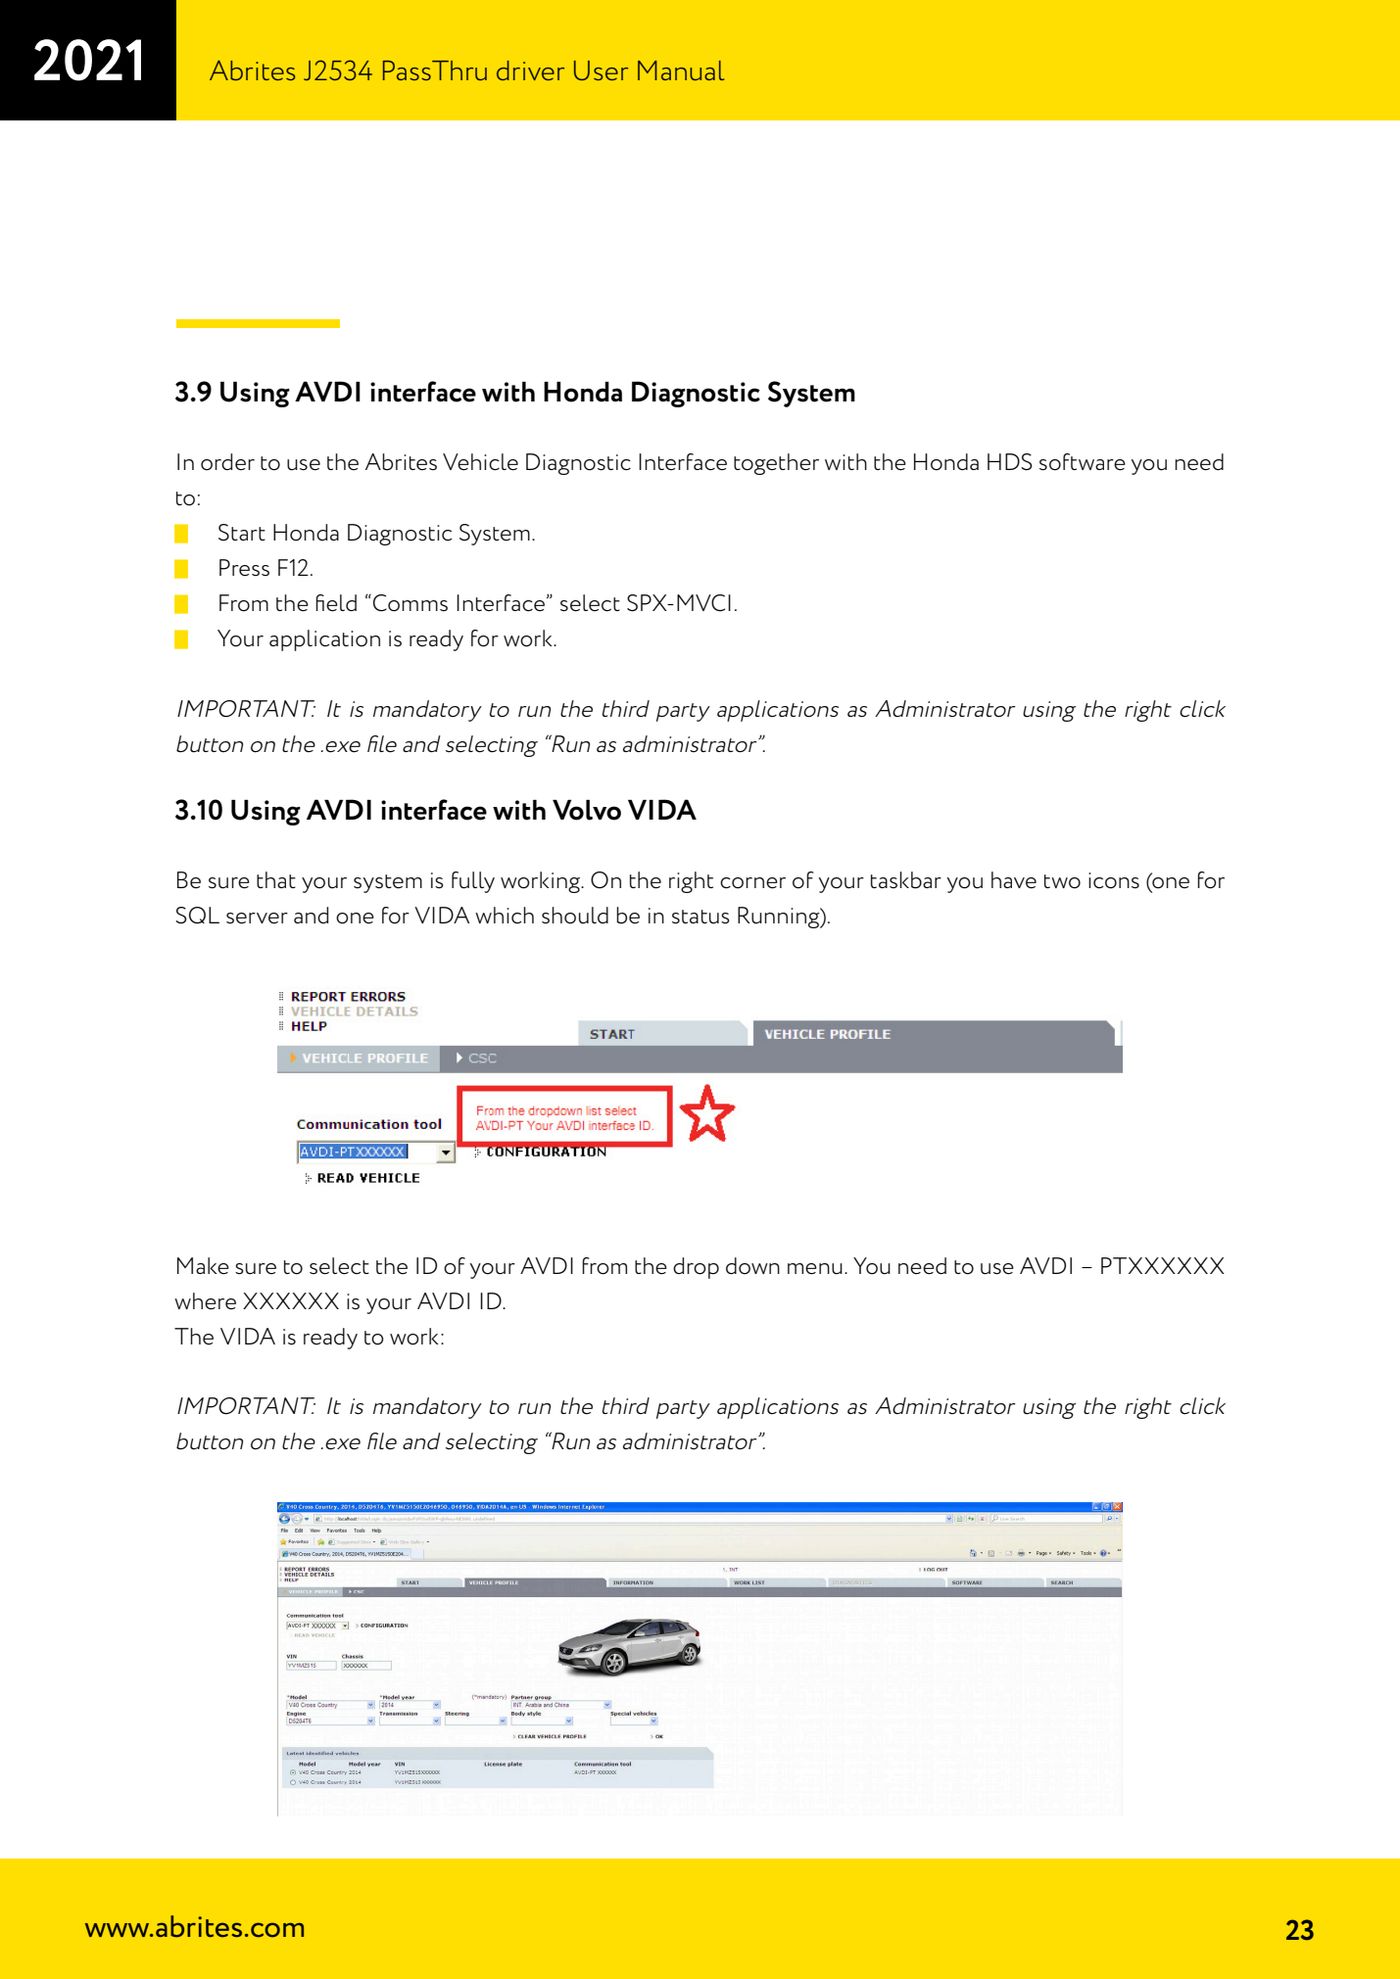
- Volvo VIDA: first of all check that the system is fully started, by looking at the two icons in the system tray at the bottom right (SQL server and VIDA), which must be in "Running" state.
- In VIDA select your AVDI ID from the drop-down menu in the form "AVDI - PTXXXXXX", where XXXXXX is the interface ID.
- Connect the AVDI to the vehicle's OBDII port and start the diagnostic session.
Reference screenshots
Source: Manuale Driver J2534 PassThru Abrites, cap. 3.5, 3.9 e 3.10 (p.18, 23) · ⏱ estimated time 10 min
← All Abrites guides Hardware catalogue
More guides Strumenti
- ABPROG ZN030: what's in the set, hooking it up to the AVDI and starting the Classic software
- Reading and writing SPI, I2C and Microwire EEPROMs with ABPROG and the ZN031/ZN035 adapter
- Erasing and reprogramming M35080VP / M35080V6 incremental EEPROMs with ABPROG
- Wiring an SPI EEPROM straight to the ABPROG DB25 without the ZN031 adapter
- Mercedes-Benz IR keys: reading the SSID, erasing and programming the NEC with ZN032 / ZN033
- Renewing used keys (HITAG/PCF) with the ZN046 adapter and ABPROG
- Solder points on key PCBs for the ZN046 and list of keys supported for renewal
- Reading the EWS3 dump on BMW E46/E39/E53 and others with the ZN055 adapter
- Reading the EEPROM on BMW F-Series FEM/BDC without desoldering, using the ZN057 extension
- Reading and writing NEC V850ES MCUs with the ZN078 adapter and ABPROG
- ABPROG DB25 pinout: building your own ZN046, ZN058, ZN078 and ZN086 adapters
- Reading the immobiliser from a Renault X95 BCM (and Audi BCM) with ABPROG and direct wiring