
Chip-Tools
Ford PMI (Programmable Module Installation): transferring As-Built data to a new module
Ford/Mazda
Interface Classic
Coding / Adaptations
Medium
⏱ 30-60 min
13 steps
The PMI function is used when a new or used module is fitted to a Ford and the vehicle's As-Built configuration has to be loaded into it. The data is read from the original module if it still works, or downloaded from the Motorcraft website using the VIN.
Required licences
- —
Hardware / cables

⚠ WarningAs-Built data must be entered with no leading spaces and one entry per line, otherwise the write is not valid. Writing to the new module is done with the ignition OFF and the module properly connected. During the write the software automatically backs up the PMI data: if anything goes wrong, the backup file is in the AVDI log folder.
Procedure
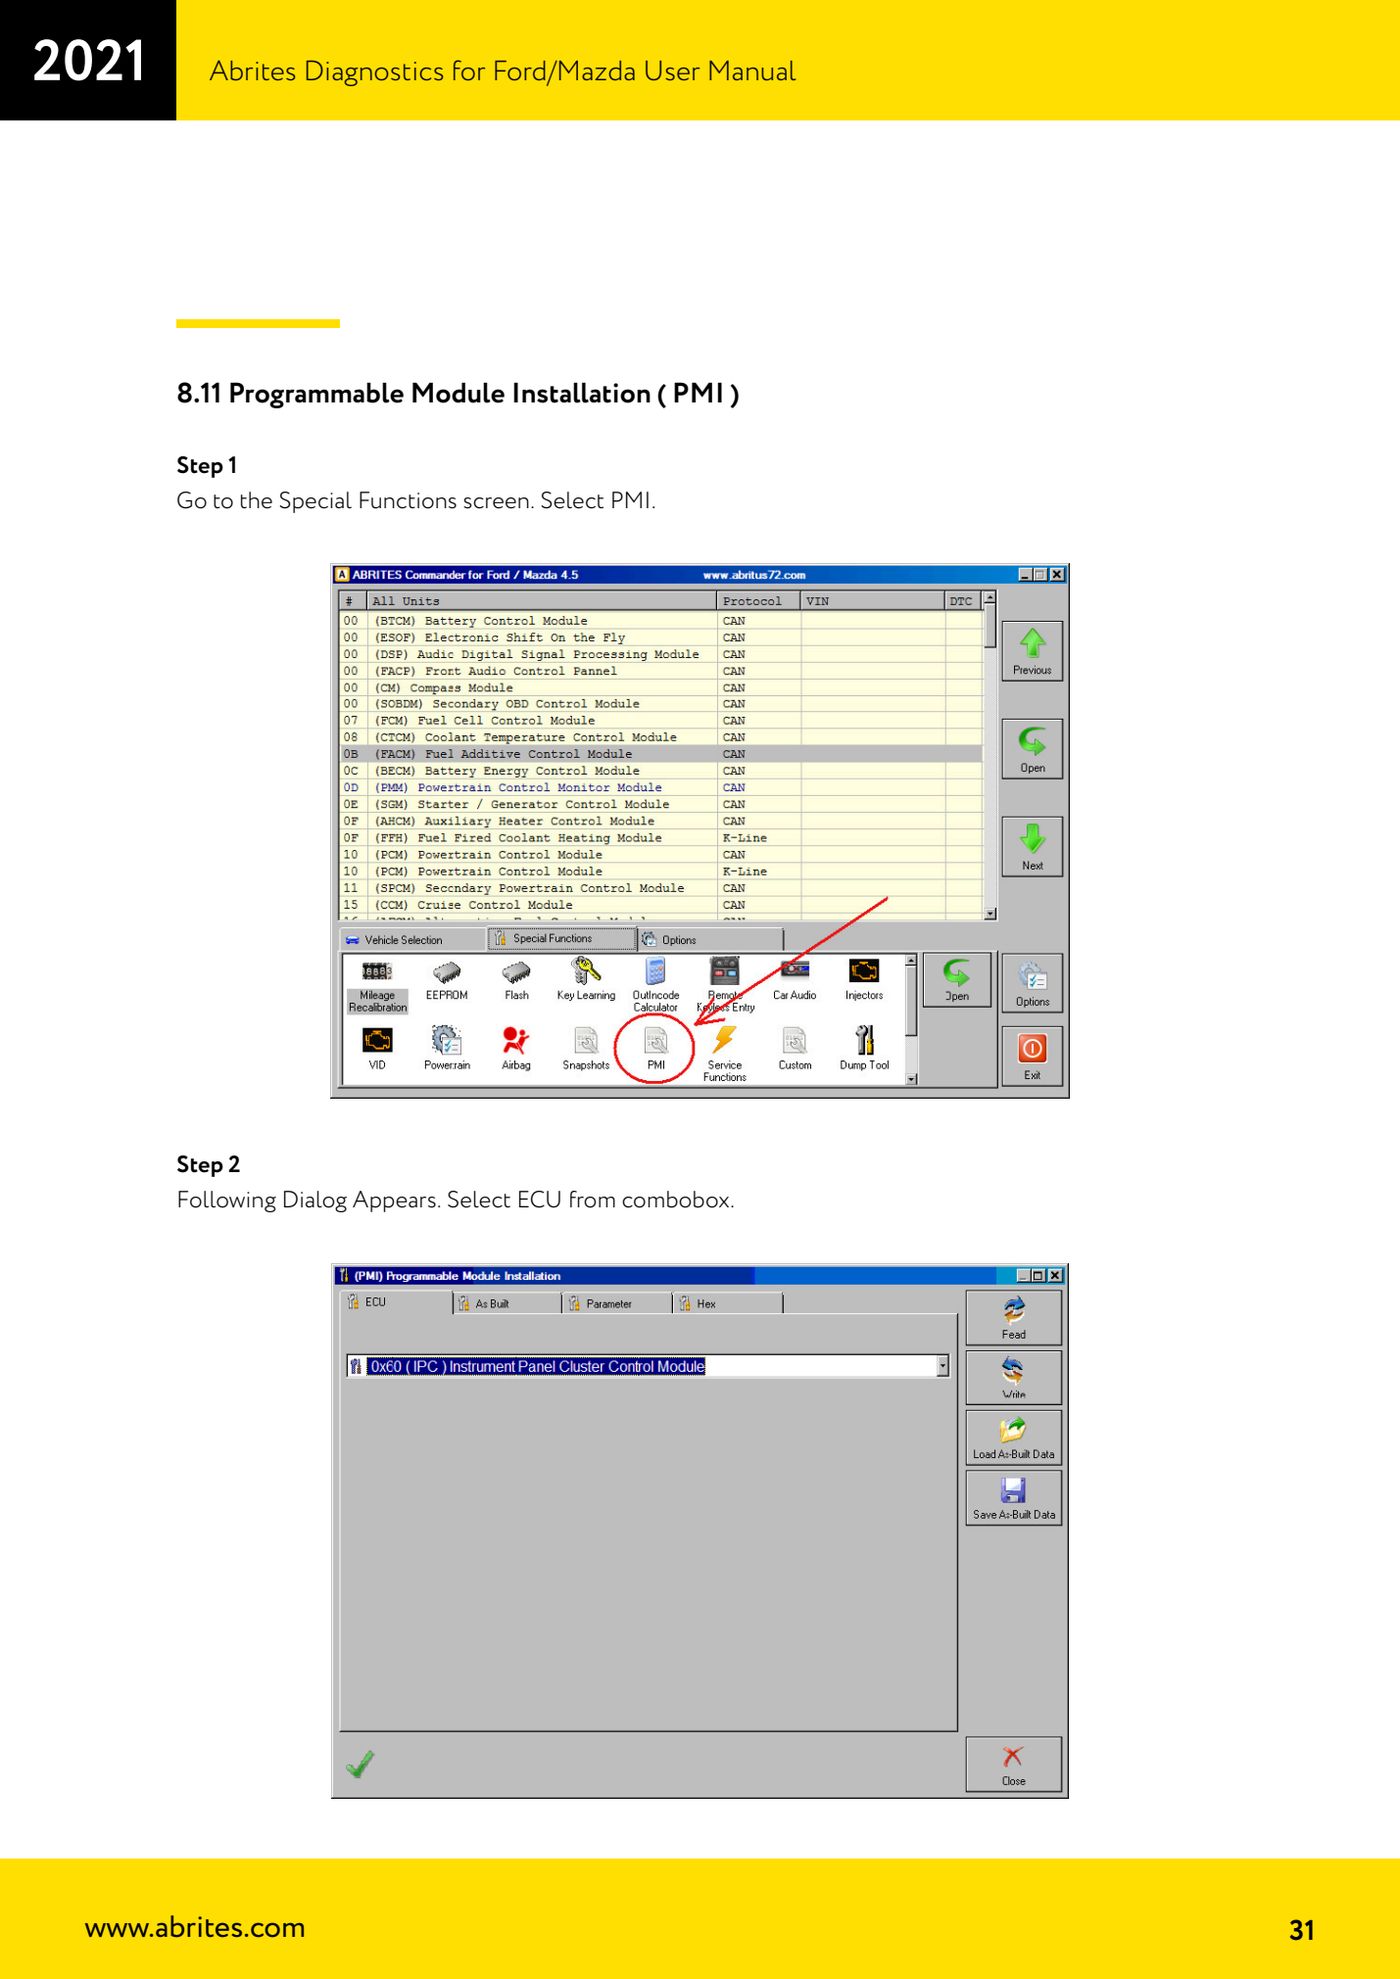
- Connect the AVDI to the vehicle and open the "Special Functions" screen, then select "PMI".
- In the dialog that appears, select the module you want to work on from the "ECU" combo box.
- If the original module is still available and communicating, keep it connected and press "Read" to read the PMI data from the vehicle.
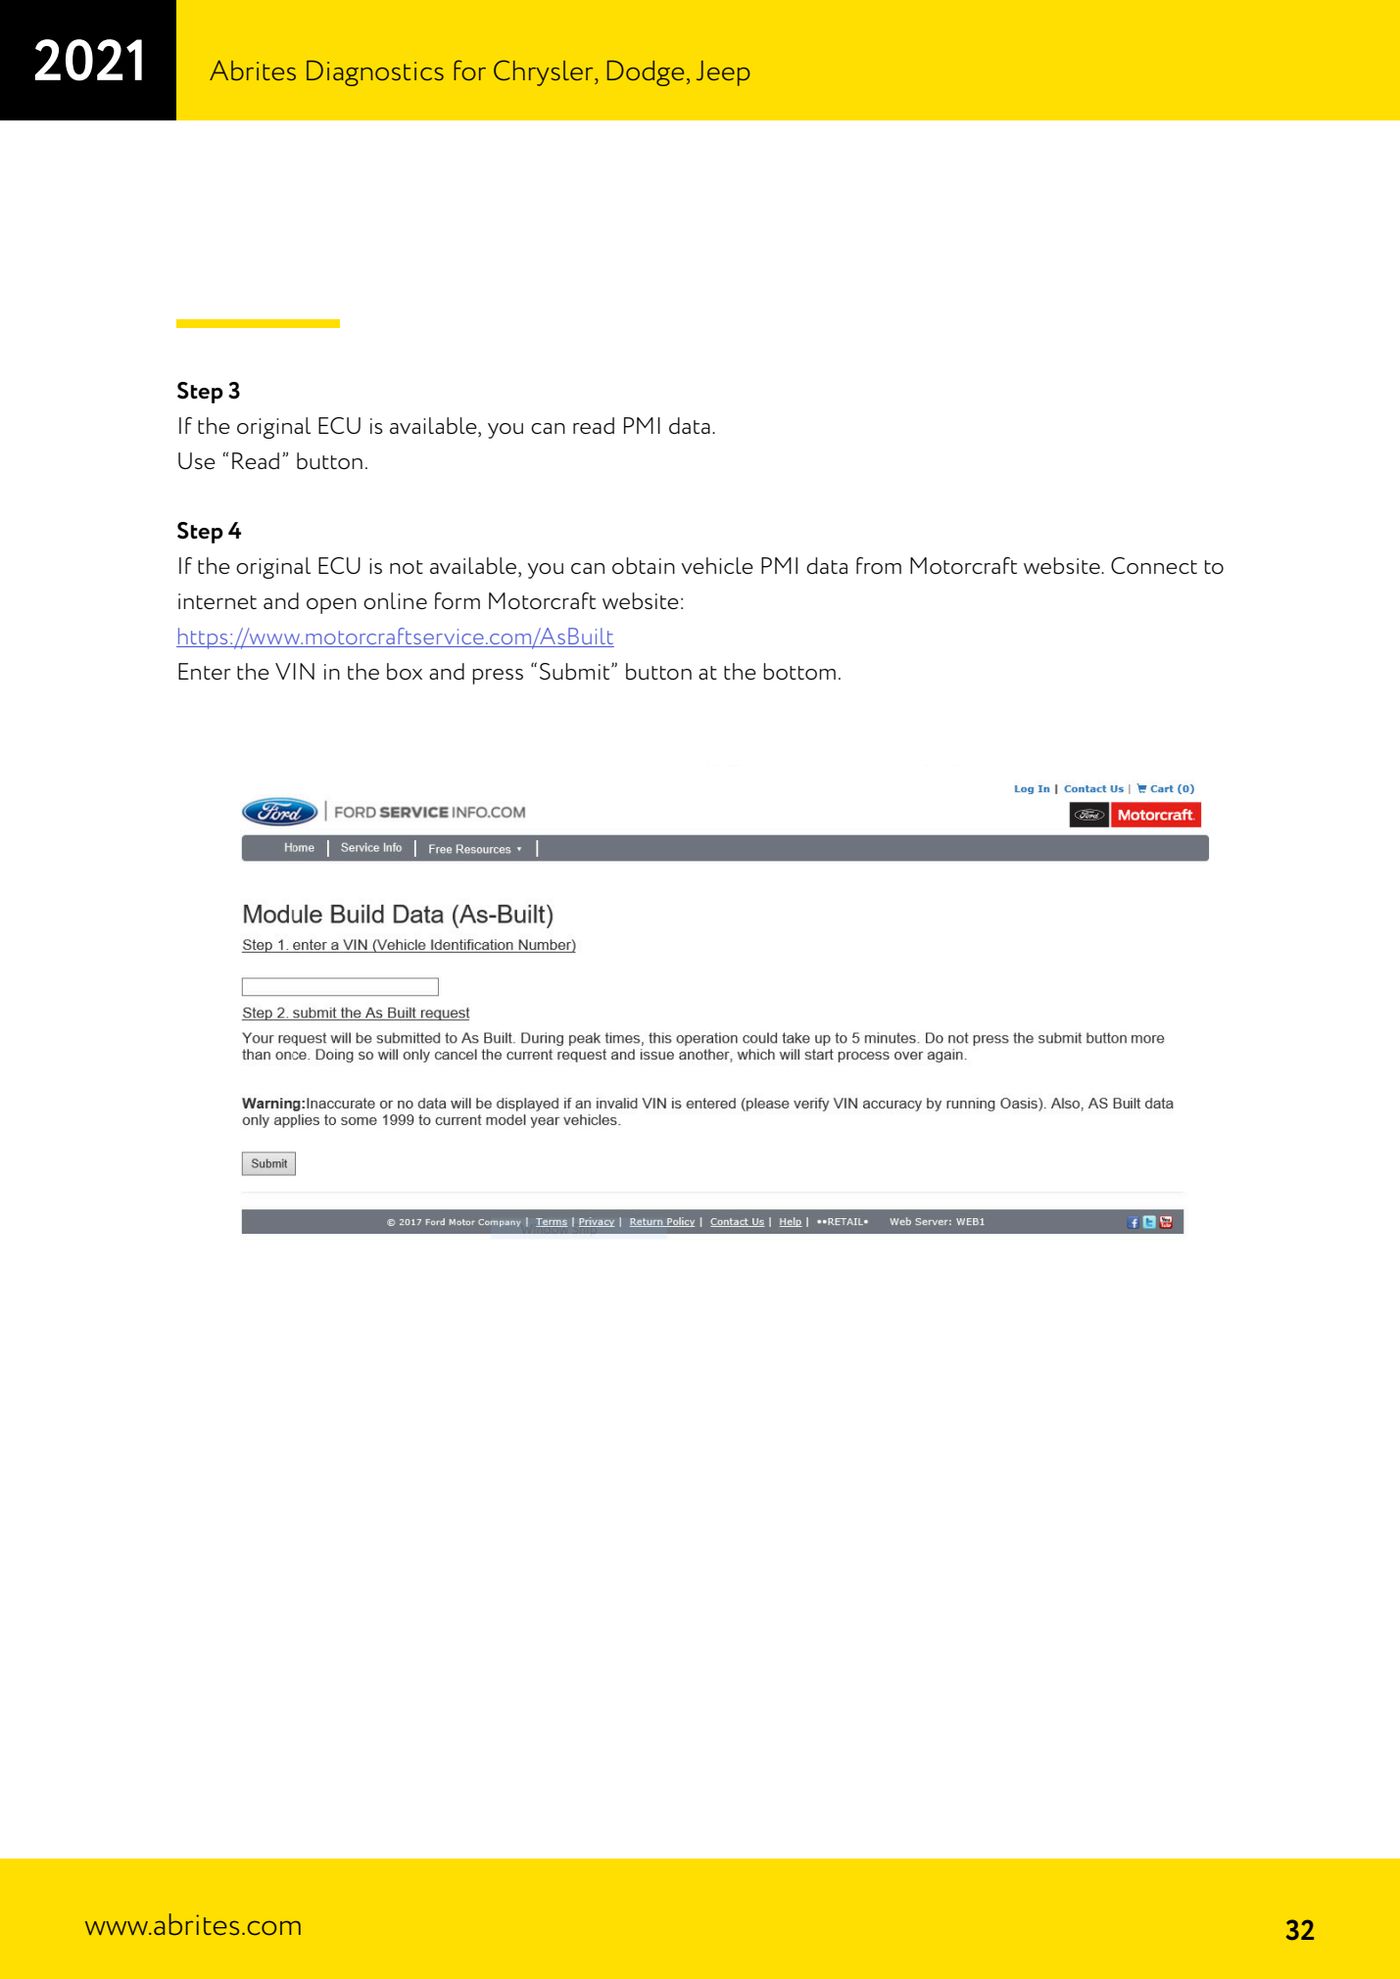
- If the original module is not available, the As-Built data can be retrieved from the Motorcraft website: go online and open https://www.motorcraftservice.com/AsBuilt .
- Enter the vehicle VIN in the relevant field and press "Submit" at the bottom of the page.
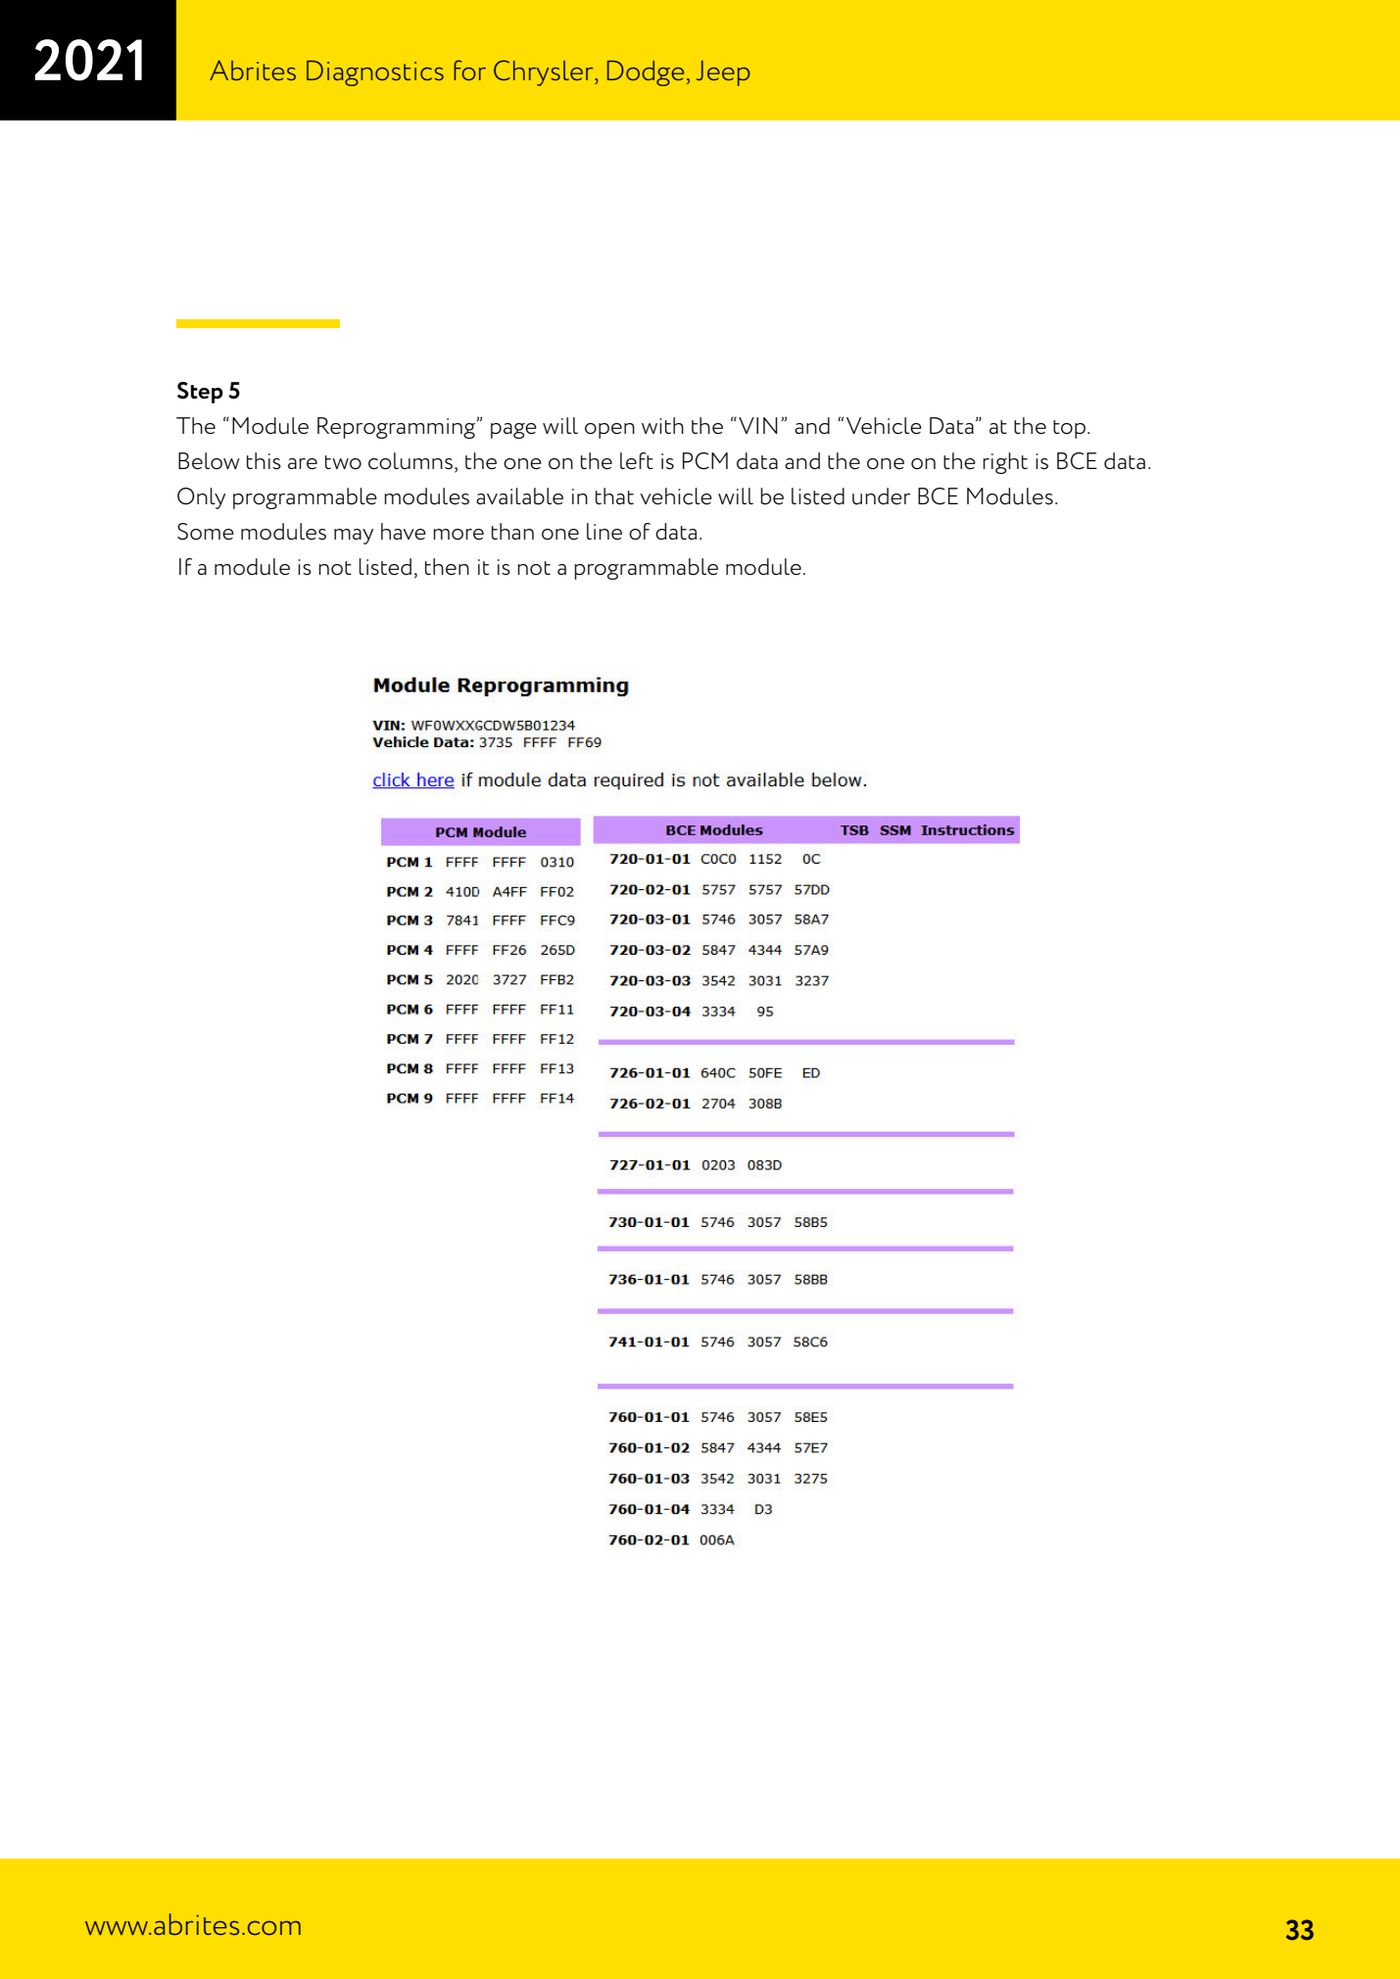
- The "Module Reprogramming" page opens with "VIN" and "Vehicle Data" at the top. Below there are two columns: PCM data on the left, BCE data on the right. Under "BCE Modules" only the programmable modules fitted to that vehicle are listed; some modules have more than one data line. If a module is not listed, it is not programmable.
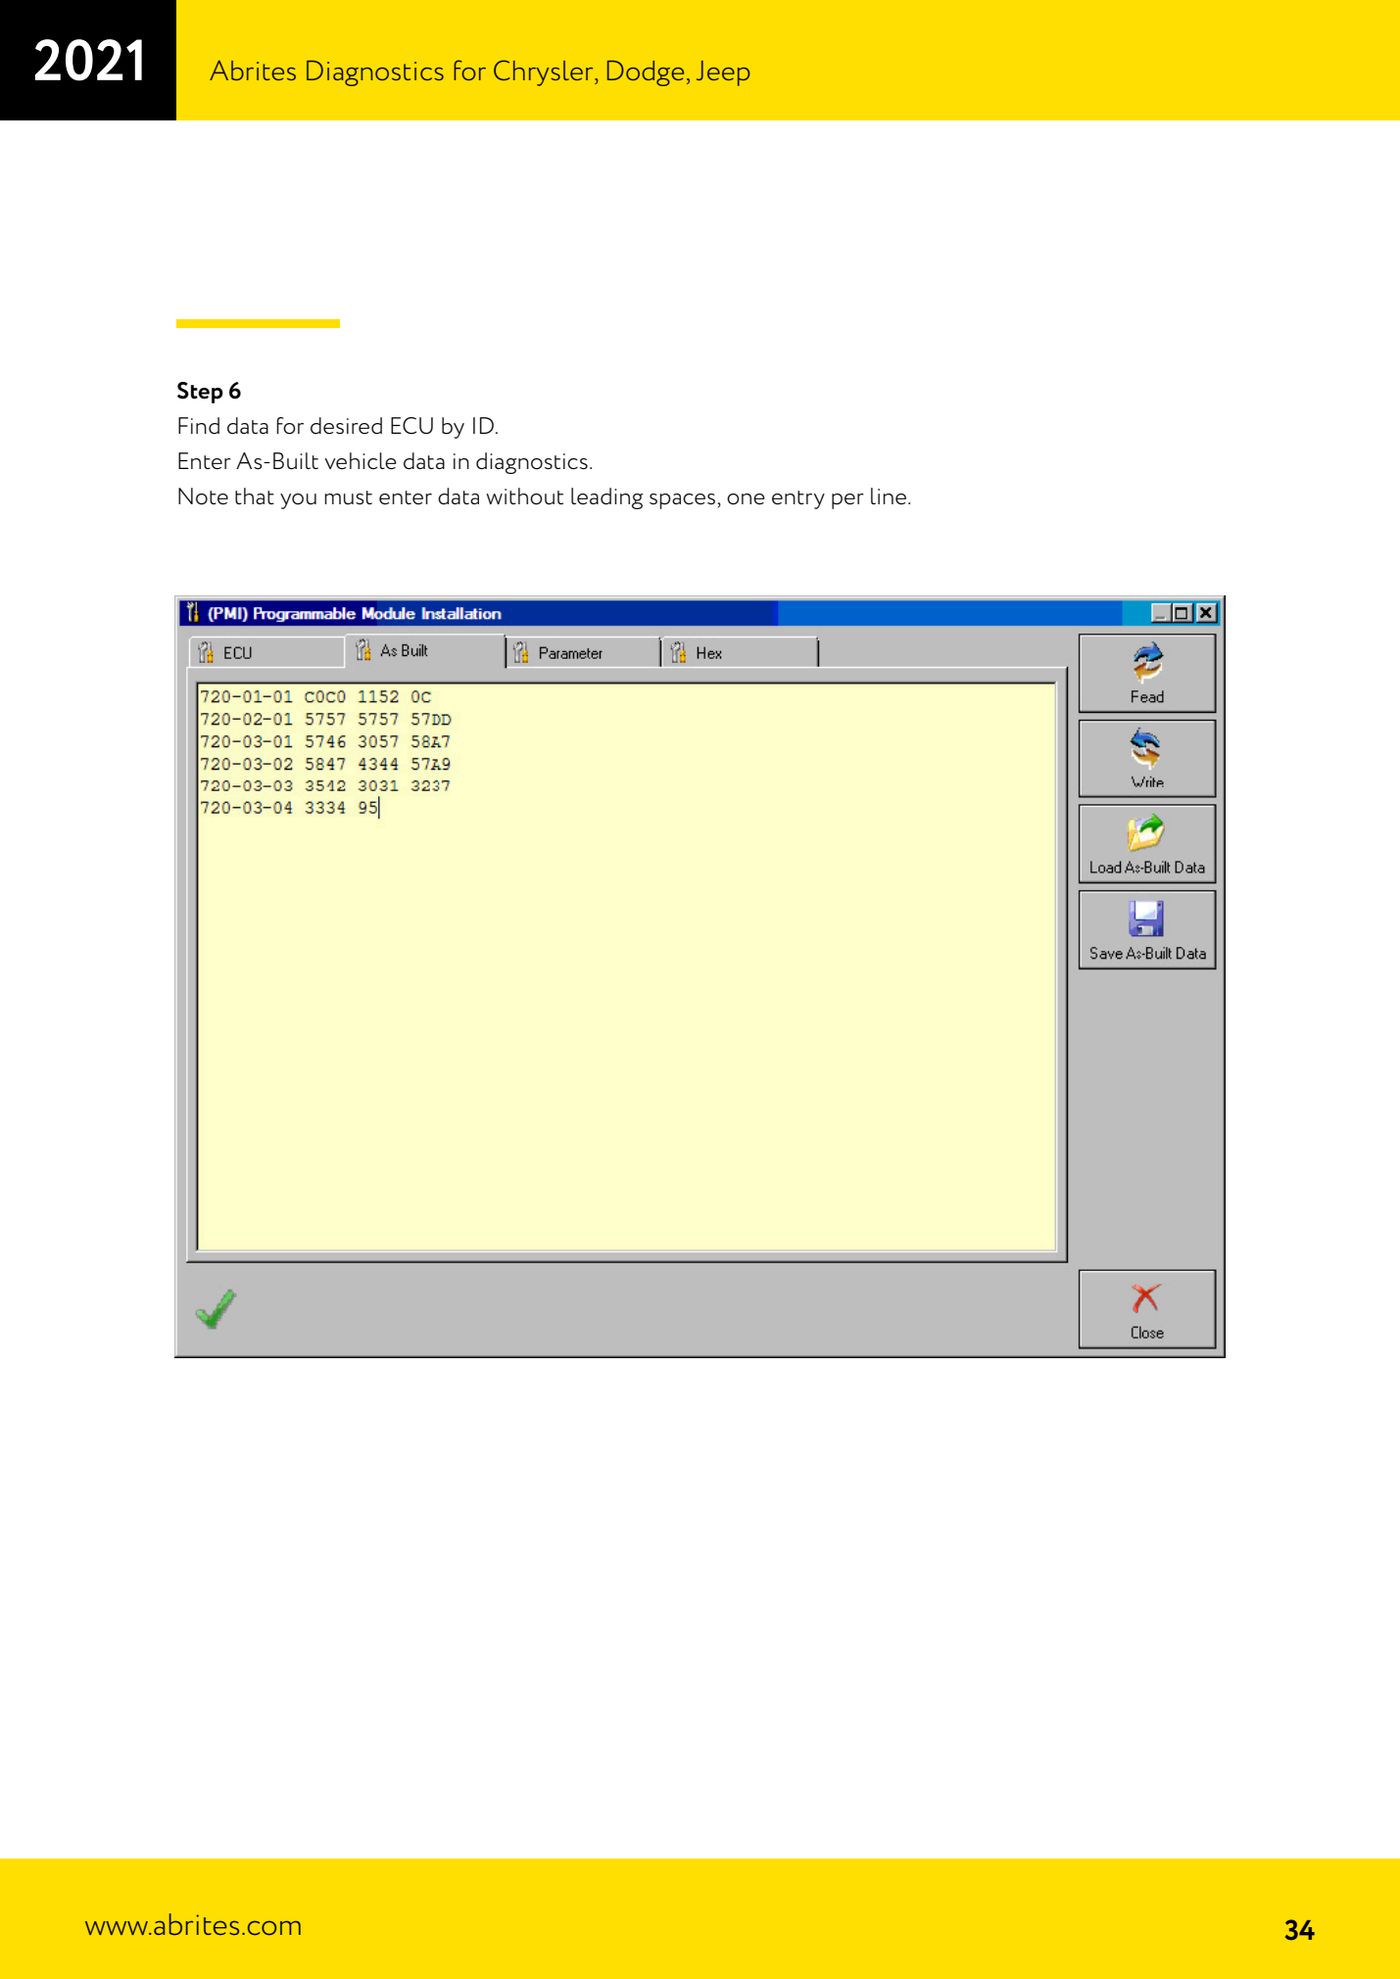
- Find the data for the module you need by looking it up by ID.
- Transfer the As-Built data into the diagnostic software: enter it with no leading spaces, one entry per line.
- If you prefer the alternative view, you can see the whole PMI data block in one go; double-click the data block to open it and edit it in the binary editor.
- Edit the As-Built data before writing, if required.
- Turn the ignition OFF and connect the new module to the vehicle properly.
- Press "Write" to write the data into the newly fitted module.
- During the write a backup of the PMI data is automatically created in the AVDI log folder, named in the format "Backup_yyyymmdd_hh.mm.ss.pmi". To restore it, use the "Load" button followed by "Write".
Reference screenshots
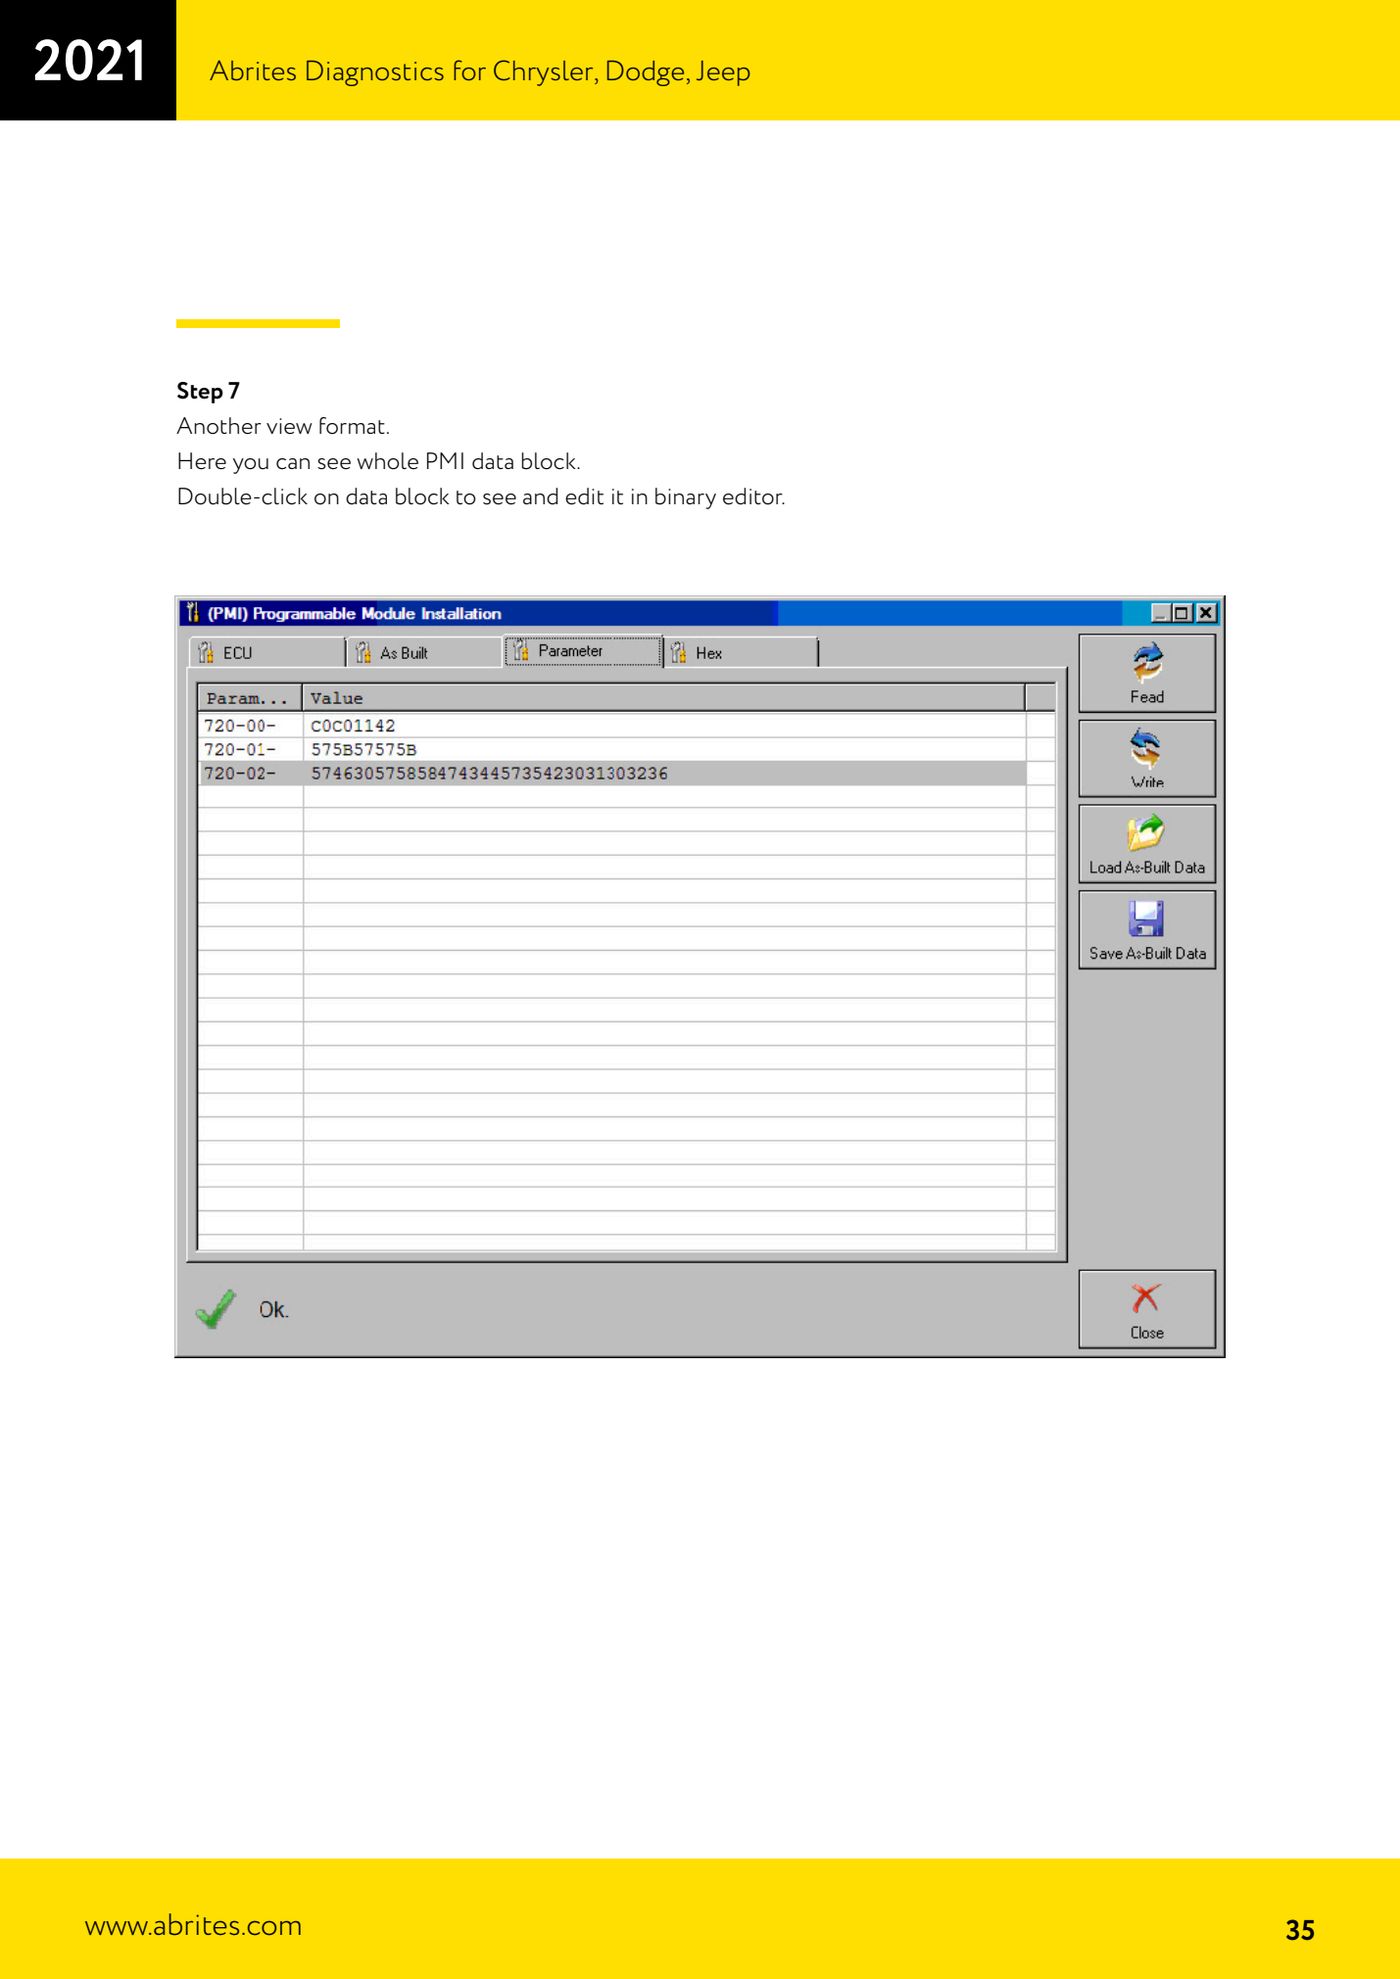
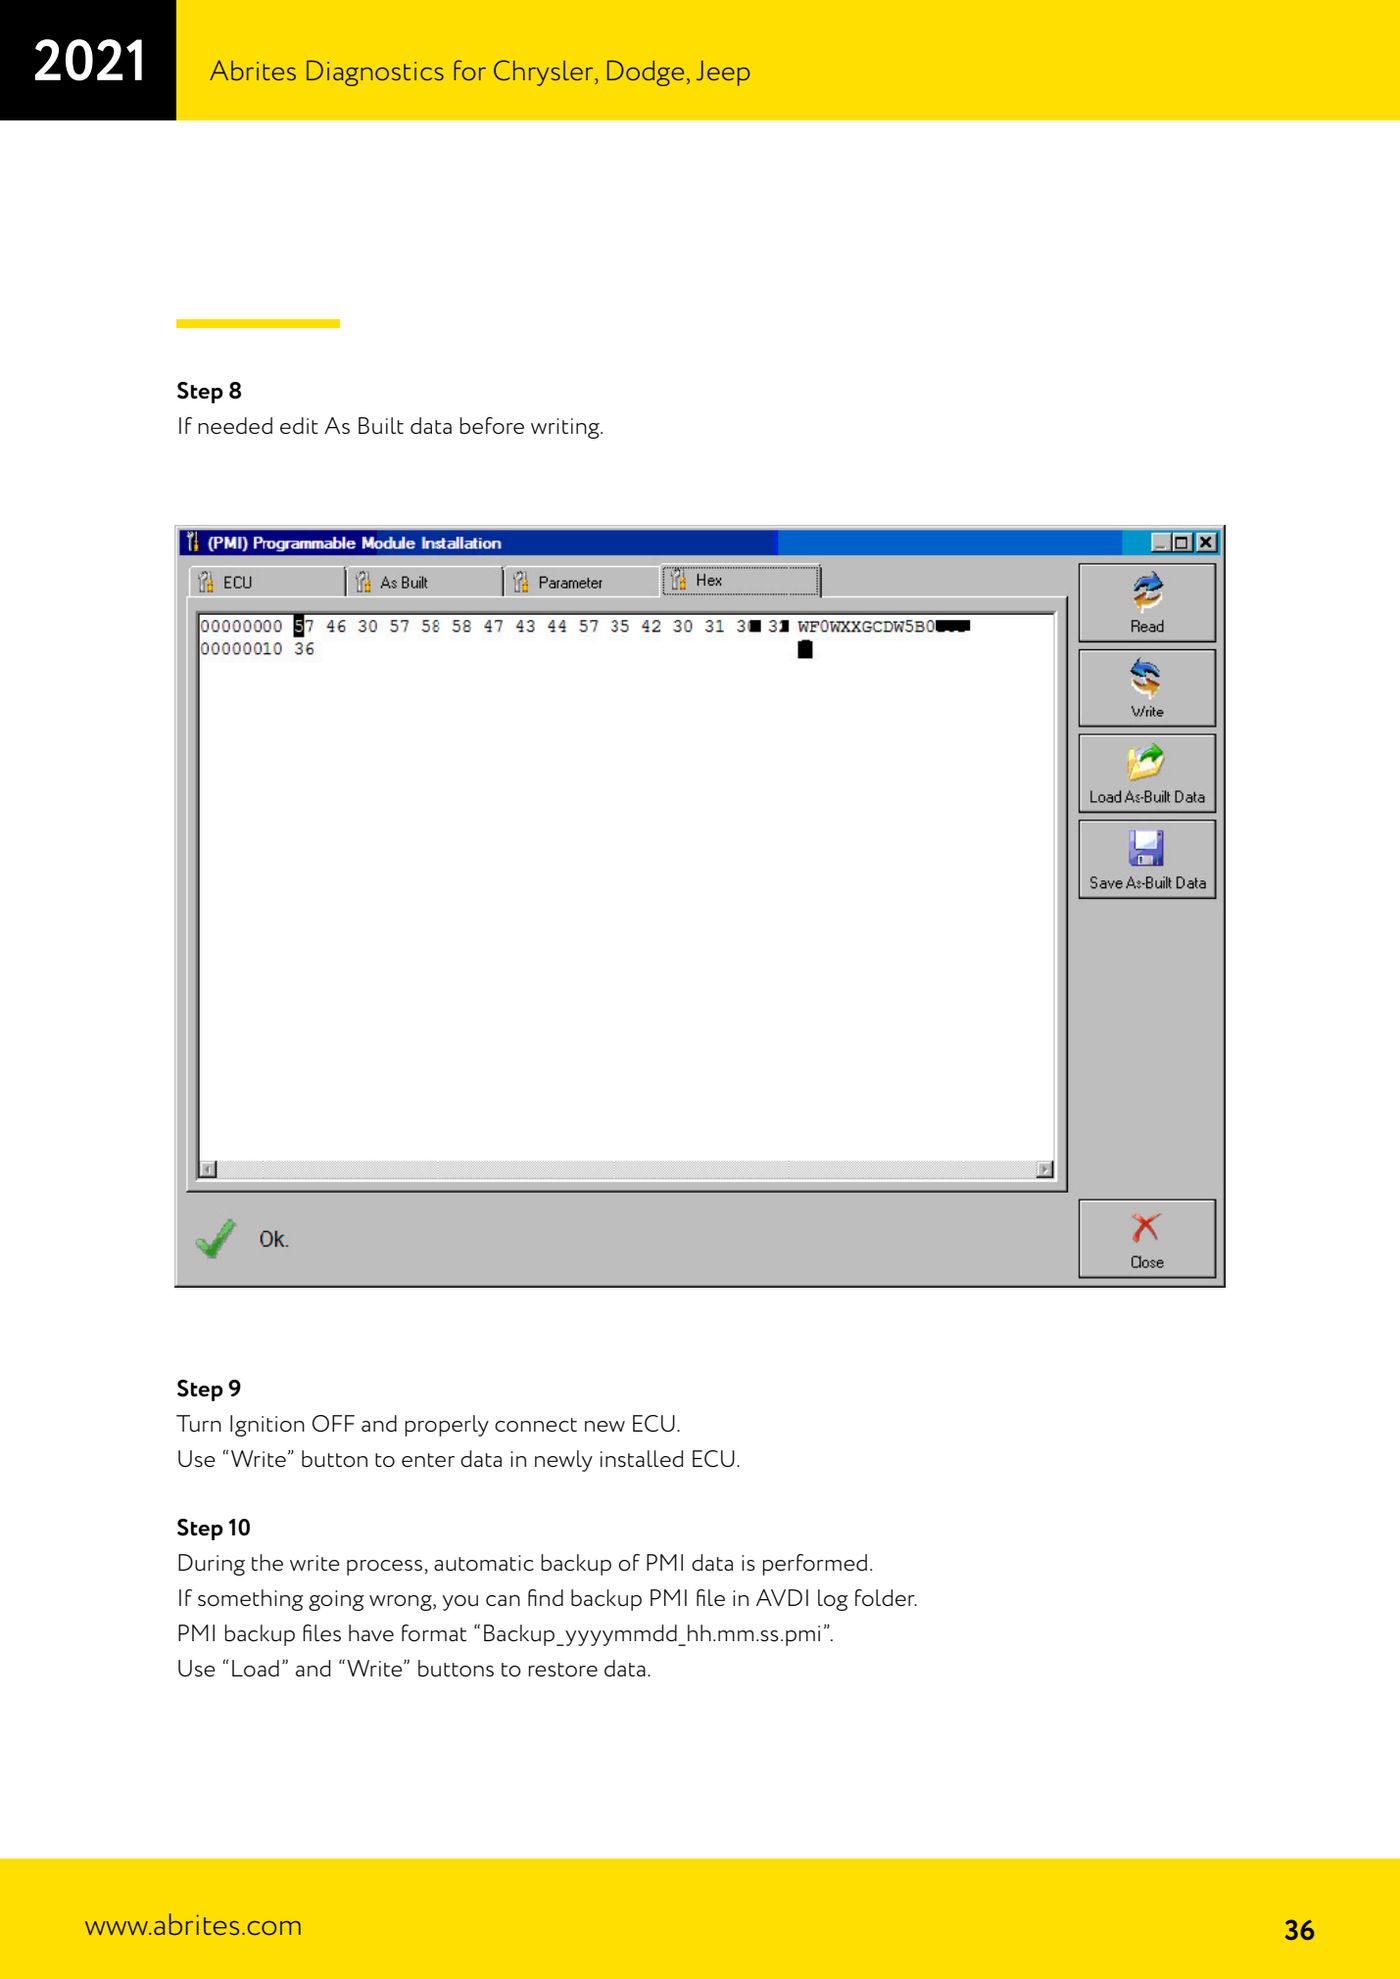
Source: Manuale Ford/Mazda, parte 2 di 2, cap. 8.11 PMI (p.31-36) · ⏱ estimated time 30-60 min
← All Abrites guides Hardware catalogue
More guides Ford/Mazda
- Starting Abrites Diagnostics for Ford/Mazda: vehicle context and ECU scanning ("Scan all")
- ECU identification, DTC read/clear and Live Data on Ford/Mazda
- Getting to the Ford/Mazda "Special Functions": Memory Read/Write and Key Learning
- PATS Key Learning: adding keys on Ford/Mazda (including with the alarm triggered)
- Key programming on Mazda CX-30 and Mazda 3 from 2019 with special function MZ001
- Ford key programming from 2021 (F-150, Maverick, Mustang Mach-E, Transit): incode from the outcode or bench read of the BCM with the ZN085
- PATS Erase All Keys: erasing all keys from the Ford/Mazda PATS memory
- PATS Initialization: matching the PCM to the instrument cluster (IPC/HEC), BCM or FIP on Ford/Mazda
- Spare Key Programming and Unlimited Key Mode: enabling/disabling Ford/Mazda key programming
- PATS OUT/IN code calculator for Ford/Mazda IDS (SINGLE xx40 and DOUBLE xx44 outcodes)
- VID block (Vehicle Identification Data) in the Ford/Mazda PCM: reading and configuring parameters
- Supported protocols and OBDII pins on Ford/Mazda: HS-CAN, MS-CAN, K-Line and J1850 PWM