
Chip-Tools
Suzuki diagnostics with AVDI: module scan, reading and clearing DTCs, live data and Active tests
Suzuki
Interface Classic
Diagnostics
Basic
⏱ 15-30 min
10 steps
Abrites Diagnostics for Suzuki is the Windows software that, through the AVDI interface, gives you full diagnostics on Suzuki vehicles: module scanning, reading and clearing fault codes (DTC), ECU identification, live parameter display and actuator testing. It is the starting point for any job on the vehicle before moving on to the special functions.
Required licences
- —
Hardware / cables

Procedure
- Plug the AVDI interface into the vehicle's OBDII socket and connect it to the PC. The AVDI is the interface built by Abrites that sits between the PC and the ECUs: use it only with Abrites software.
- Turn the ignition ON and make sure the vehicle is safe to test: chock all wheels and work in a ventilated area, with the exhaust gases ducted out of the workshop.
- Start the software from the Abrites "Quick start" menu by clicking the Suzuki icon. The Suzuki application is installed together with the rest of the Abrites diagnostic suite, which you receive by e-mail.
- The main screen holds the navigation buttons, vehicle selection, the scan and the global DTC clearing. Start by selecting the vehicle you are working on.
- Run the scan from the main screen to find every module present and communicating on the vehicle.
- Open the module you are interested in to read the stored fault codes (DTC) and to check the ECU identification.
- Look at the module's live data to check sensor behaviour and get to the actual cause of the fault, not just the code.
- Use the Active tests to drive the actuators and confirm whether the component responds to commands or whether the problem is upstream (wiring, supply, ECU).
- Once the fault is repaired, clear the DTCs from the individual module or use the global fault code clearing available on the main screen.
- Repeat the scan after the repair to confirm the codes do not come back with the ignition on and, where possible, after a short road test.
Reference screenshots
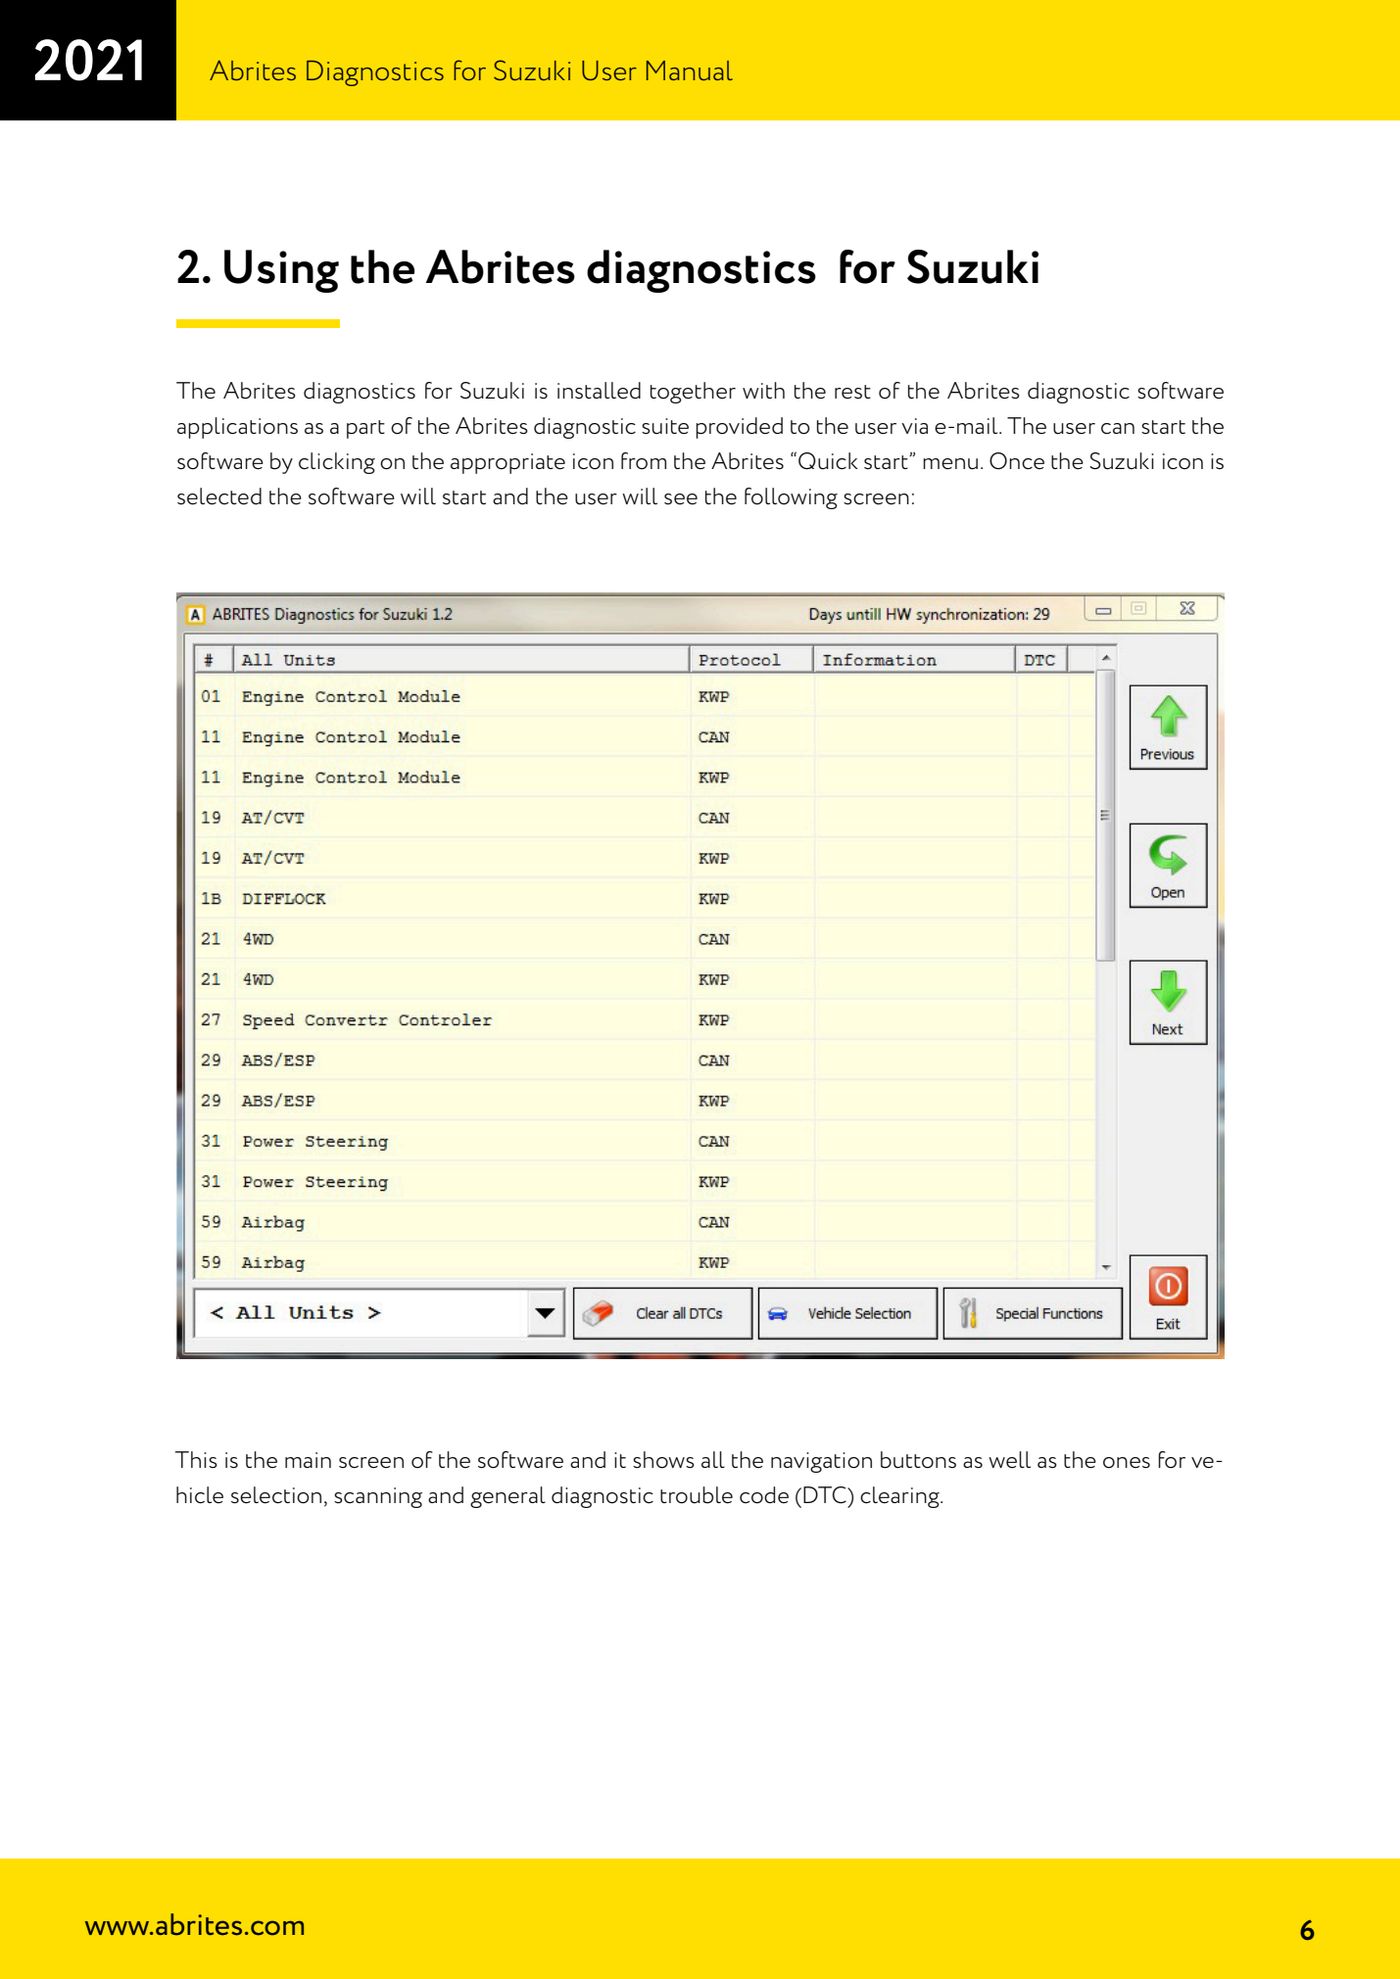
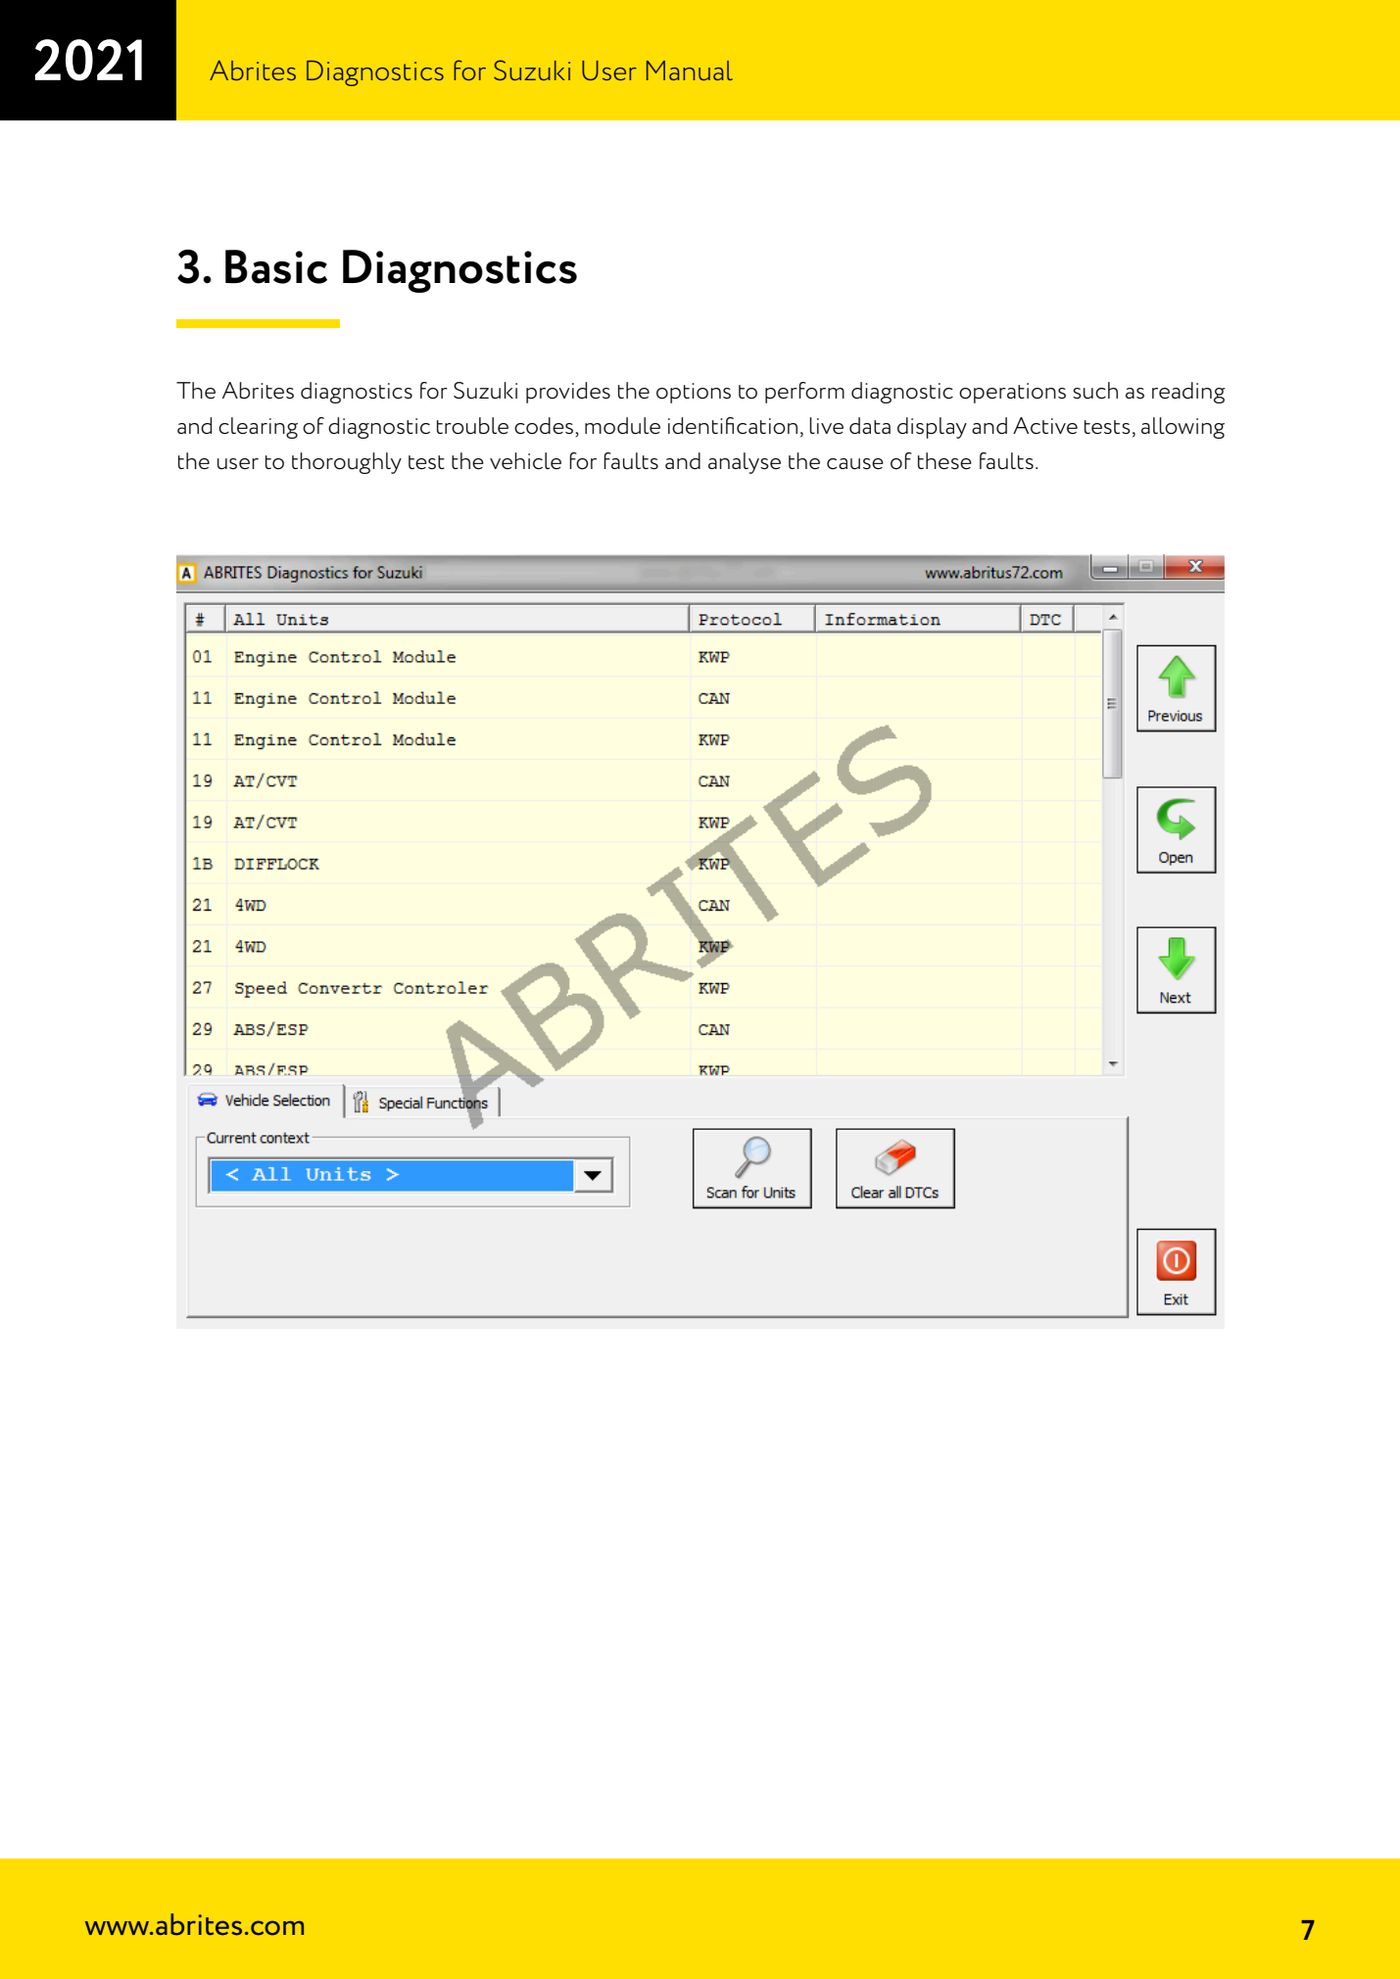
Source: Manuale Abrites Diagnostics for Suzuki v1.0, cap. 2-3 (p.6-7) · ⏱ estimated time 15-30 min
← All Abrites guides Hardware catalogue